×

Why We Need to Be Wild: Book Review and Reflection
“It’s a fox!” Not a live fox, but a furry orange lump lying on the side of the highway, eagerly (and illegally) rescued from its irreverent roadside...
")


Handmade ornaments are the most treasured holiday decorations in our home. Each one is a miniature time capsule that we dig up every December, reminding us of special moments in our lives.
There are lots of ideas for making handmade ornaments, check out my Handmade Christmas Pinterest page, but if you’re looking for something quick, easy, natural and kid approved, try these three ornaments made with oranges. The added benefits of using oranges is that your home will smell amazing, your children will likely eat some and get boost of Vitamin C and you can compost the ornaments when they’ve lost their luster.
If you’re looking for a lovely holiday book about oranges I highly recommend: An Orange for Frankie.

Find the half-way point of the ribbon and line it up with the stem of the orange. Wrap the ribbon around the orange, twisting the pieces around the opposite side (navel) and coming back to the stem. Tie a knot. Using a wooden skewer, poke holes through the rind and push whole cloves into the holes. Hang your pomander somewhere with good air circulation.


Vegetable Fruit Cutters
Using a serrated knife, cut the orange in half. Use your fingers to separate the orange flesh from the peel. Try your best to keep the peel in one piece. Eat the orange. If needed, make four small cuts around the edge of the peel so that it lies flat. Take a metal cookie cutter, place it on the peel and hammer away. Add a string to each ornament using a needle and thread. If you like, poke holes through the rind with a skewer and add whole cloves. Hand these lovely little ornaments on your Christmas tree or outside around your home.


Nesco Food Dehydrator
Slice the orange crossways about 1 cm (about 3/8 inch) think and lay the slices on a dehydrator rack, oven rack or baking tray covered with parchment paper or non-stick mat. If you are using a dehydrator, set it to 57°C (135°F). If you are using an oven set to 200°F on convection.
The orange slices will dry more quickly in the oven, about 2 to 3 hours, whereas the slices in the dehydrator could take about 6 hours or more to dry, depending on how thick you’ve sliced the fruit. Check on the slices occasionally and remove them from the dehydrator or oven when they are dry to touch.
Use pieces of string or ribbon to hang the dried oranges. So pretty!


Disclaimer: This page contains Amazon Affiliates links and I may earn a small commission from your purchases made through them.
“It’s a fox!” Not a live fox, but a furry orange lump lying on the side of the highway, eagerly (and illegally) rescued from its irreverent roadside...
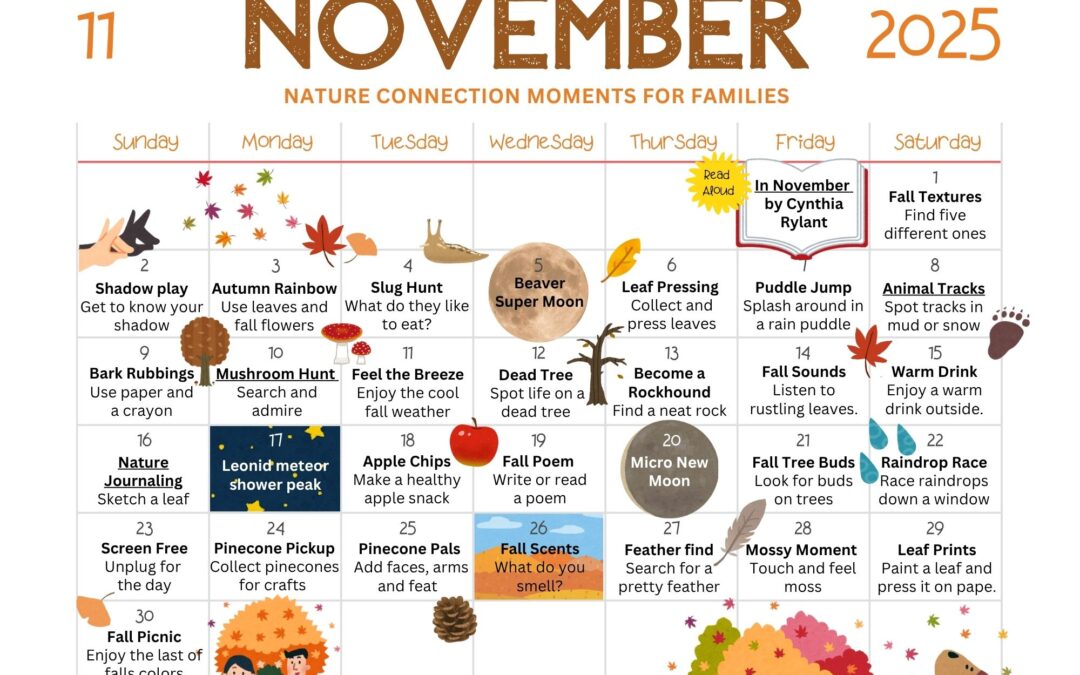
Hello, November! November holds a special place in my heart. It used to be one of my least favorite months, the beauty of early fall fading, the...
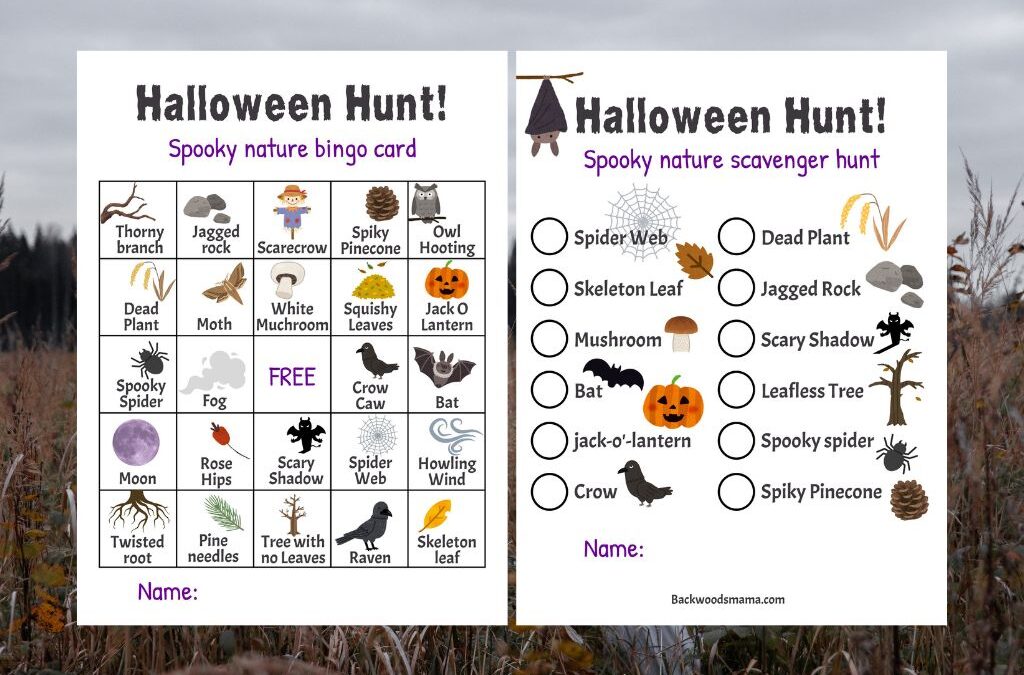
Halloween is here, along with all the spooky, magical things happening in nature as fall deepens. Spiders creep into cozy corners, webs glisten...
Beautiful work.