×

Why We Need to Be Wild: Book Review and Reflection
“It’s a fox!” Not a live fox, but a furry orange lump lying on the side of the highway, eagerly (and illegally) rescued from its irreverent roadside...

Using pinecones for arts and crafts is so much fun. Pinecones come in all shapes and sizes. Big pinecones, little pinecones, round pinecones and long pinecones. Finding the perfect pinecone is just as much fun as making these adorable pinecone gnomes.
Disclaimer: This post contains affiliate links. As an Amazon Associate I earn from qualifying purchases.
Absolutely! If your child hasn’t learned how to use a needle this might be a great opportunity to teach them how. Kids can learn how to hand sew around the age of six, depending on the child.
These pinecone gnomes are made without glue. That’s right – no glue! There’s a couple reasons for this. First, the gnome’s hat and décor are meant to be easily removed so that they can be swapped to match any season or celebration. Swap the pink hat for a green one and voila a spring or St. Patrick’s day gnome. Second, in the off-chance that you would like to reuse, recycle or compost any of the gnome components it’s very possible to do that without having everything glued together. That being said, if you would like to use glue go right ahead! Gluing on the hat will definitely make it less likely to fall off.

1. Print off the template and use it to cut out the felt hat and hearts.
Note: This template is for a large pinecone. You can resize the template using your printer settings. Double check the measurement of the hat by cutting out the paper template and seeing if it will wrap around the top third of your pinecone. When you’re happy with the fit use the paper template to cut out the felt pieces.
2. Assemble the hat. You can add a decorative stitched edge to the bottom of the hat by using a blanket stitch or running stitch. This is optional but best done before sewing the hat together. Once you are happy with the bottom edge, fold the hat in half and sew the long edges together. The hat can be assembled using a blanket stitch or a running stitch, but if stitching is not something that you or your child is comfortable with you can also use glue.
3. Thread the wooden bead onto the pipe cleaner and placing the bead right in the middle of the pipe cleaner. This will be the gnome’s nose.
4. Tear a piece of white wool roving from your stash and lay it on top of the bead and pipe cleaner. Make a little hole in the middle of the wool for the bead to pop through. This will be the gnome’s beard. Fold the wool over the pipe cleaner.
5. Attach the nose and beard to the pinecone by weaving the ends of the pipe clear around the top of the pinecone. The pipe cleaner will be hiding by the hat so don’t worry about how it looks. Tease, brush and twist the beard until you like the way it looks.
6. Place the hat on top of the pinecone. Wiggle it around until is sits just above the gnome’s nose. If the hat keeps falling off use a bit of glue to keep it in place.
7. Assemble the heart. The heart can be a simple felt cutout, or a cute heart pillow. To make the heart pillow stitch together two heart templates leaving a little hole to push in some wool filler. Once stuffed sew up the hole.
8. Place the heart onto the gnome’s beard. It should “stick” to the felt but if you would like it to be more permanent you can glue it in place.


“It’s a fox!” Not a live fox, but a furry orange lump lying on the side of the highway, eagerly (and illegally) rescued from its irreverent roadside...

Hello, November! November holds a special place in my heart. It used to be one of my least favorite months, the beauty of early fall fading, the...
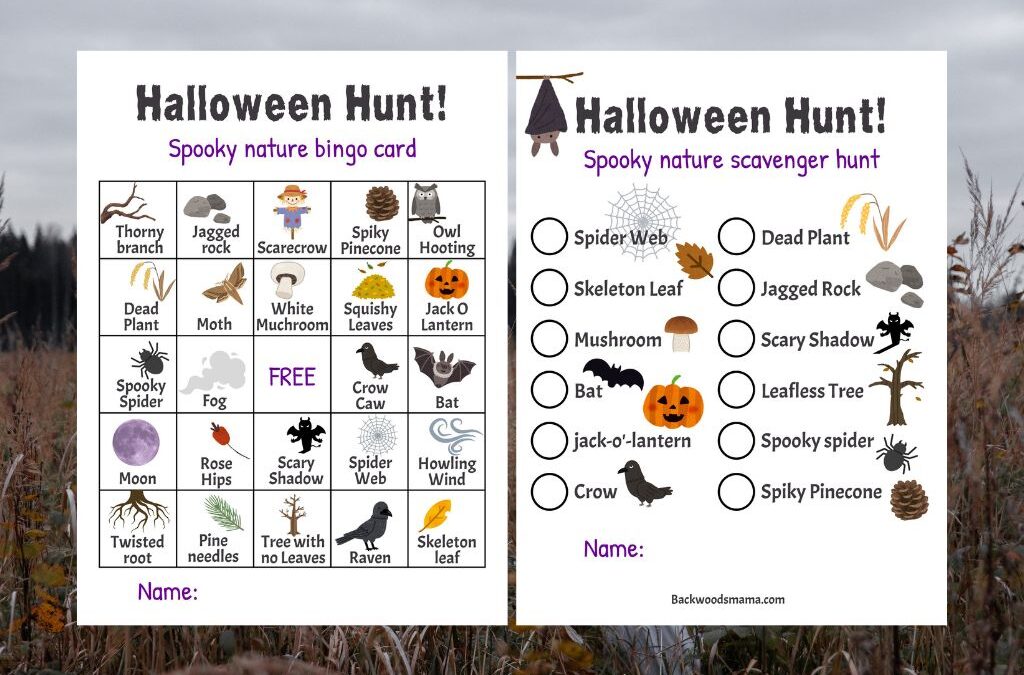
Halloween is here, along with all the spooky, magical things happening in nature as fall deepens. Spiders creep into cozy corners, webs glisten...
0 Comments